Today we will be looking at some ideas on how to add interactivity to maps without overloading them. Both are based on recent questions in the forums and we will also be building on one of my previous posts as well as make use of the latest addition to Tableau – Dynamic Zone Visibility.
Part 1 – Show connection paths on hover
For our first part, we want to visualise travel routes. However, the caveat here is that we are having so many routes, that we just cannot display them all at once.
So, we will only show the routes when our user hovers over a starting place.
For this exercise, I have created a quick fake data source based on US cities and their geo positions taken from https://simplemaps.com/data/us-cities.
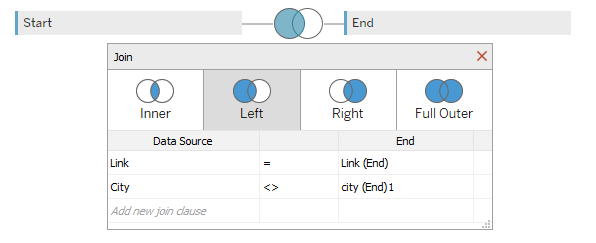
This I have limited to State of NY and then done some random numbering in excel as a link and joined it to itself:
So with that established let’s continue.
Building the map
Start by draging [longitude] and [latitude] on columns and rows, respectively. If not done automatically, set to average.
Then, move [City] to the details so your yours will get split accordingly. This suffices for our basic map already, the rest is just cosmetics.
Next, create a calculation to determine the travel path
//Path
MAKELINE(
    MAKEPOINT([Lat],[Lon]),
    MAKEPOINT([lat (End)],[lon (End)])
)
This gives us the path between our start and our end location.
But we are not done yet. For the interactivity, we need to create a parameter, I will call it [p.selected_city] and its a string parameter that allows all values.
Then, create another calculation:
//Selected path
if [p.selected_city] = [City] then [Path] END
Drag [selected path] onto your map and put it onto a new layer.
Finalise the interactivity by creating a dashboard, putting your map on the dashboard and creating a parameter action with the shown setup:
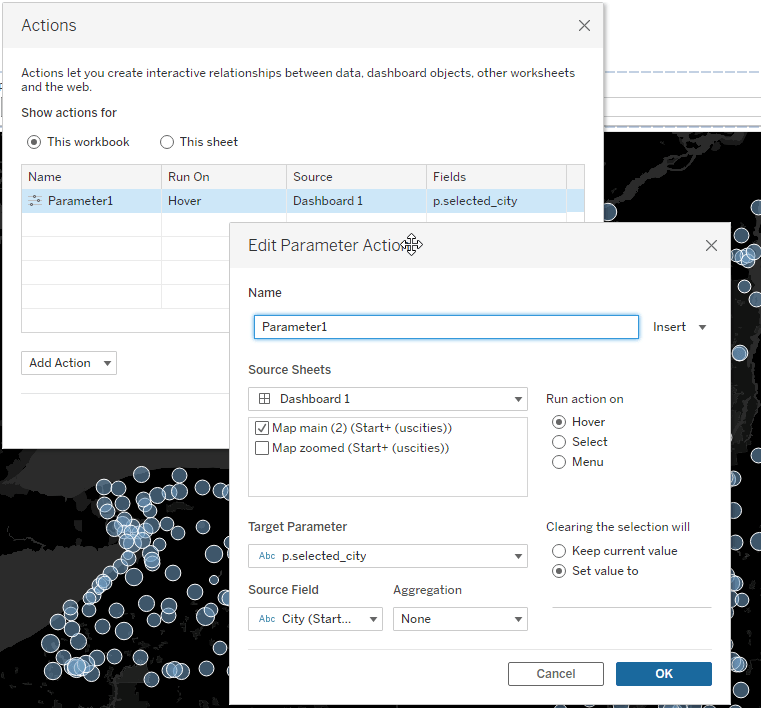
This is all we need, the user will now trigger the action, the city name will be sent to the parameter and our [selected path] calculation will show all routes where the selected city is the starting point
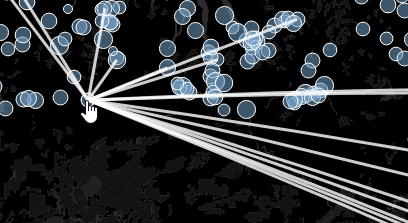
Notice though that we will get “one unit” of lines connecting the cities. This is because the [selected path] holds true for all the connections the selected city has.
We will leave it as is for now and have a look at adding granularity to enable selection of individual routes in the second part of this series.
So, that’s it for today.
I hope you found that useful and as always, appreciate your feedback.
Steffen

Leave a comment