This is a question that recently came up and my solution to this is quite simple.
Assume you have an empty date parameter, that is a parameter of “date” type with no limitations like this:

This will enable your users to click it and be greeted with a calendar style date picker w/o any further preparations:

However, assume for whatever reason, your date must always choose the Sunday of the week. This is the week in which we selected the date. Sticking with the above screenshot, if the user clicks 10 April 2025, the date should fall back to 13 April 2025. If he selects 21 April, then it would be 27 April and so forth.
Now it obviously isn’t hard to turn this into a calculation. All we need is a minimal calculation. For those of us living in ISO week based countries we can use this:
//para update field to sunday
[p.date]+7-ISOWEEKDAY([p.date])
We simply add a whole week to our selected date and subtract the isoweekday (where Monday = 1 and Sunday = 7) from that again to find the next Sunday. For those that adhere to other standards, it should be simple to adjust this to your country’s standards.
Now: how do we get the parameter to update always to the end of the week, aka Sunday in ISO terms?
To achieve that, we need to introduce a second parameter. Again, make it a date parameter that accepts all values. I named mine [p.interim].
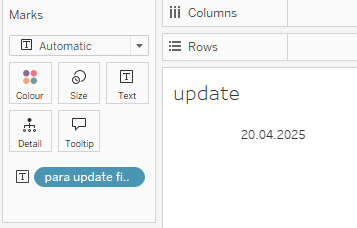
Second, create a simple sheet where all we need is to have our just created calculation somewhere, for example on the text marks:
Then, as your next step…
Create a dashboard.
Put the sheet you have created on the dashboard. We need it on the dashboard but it can be hidden later on. For now leave it so you see the action.
Add [p.date] parameter so people can select from it. Give it a try and select a date from the parameter and notice how on the sheet, you will see the respective Sunday’s date.
The [p.date] parameter nonetheless will remain at what you have selected.
To fix this, add our second parameter [p.interim] to the dashboard (again, this is not actually needed but we want to be able to see what happens).
Finally, add two times extensions on your dashboard. These can later on also be hidden

From the popup, search for “Data Driven Parameter”. It is an official Tableau extension and it is sandboxed so it should be totally fine to use in any circumstance.
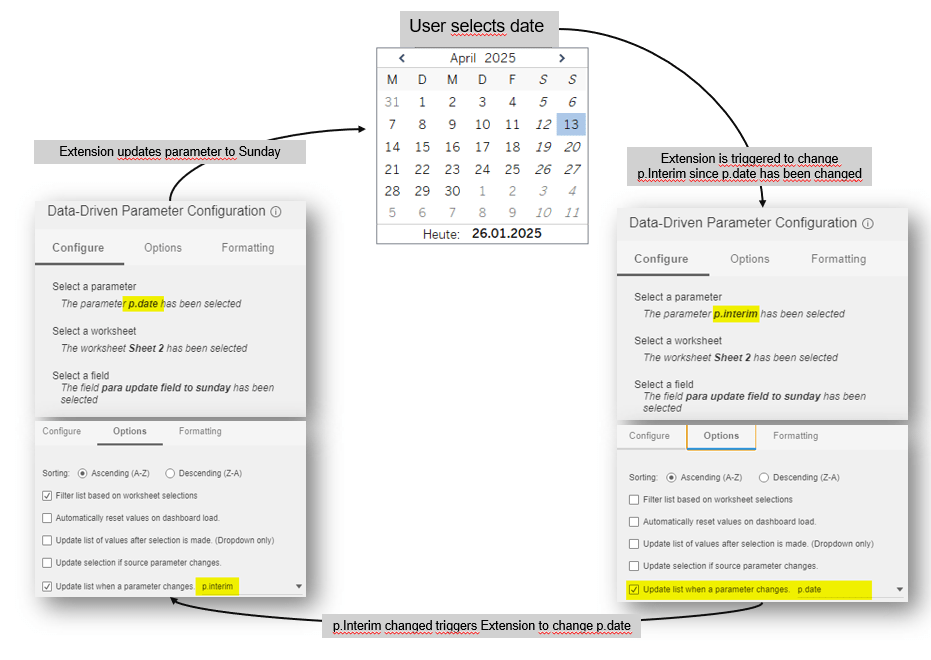
Set your first extension as follows (Sheet 2 is my simple sheet).


Notice how we tell our main parameter [p.date] to update to whatever is in the calculated field.
We can tell the extension to update a parameter when a(nother) parameter changes but we cannot tell it to update the parameter that itself is the trigger. I.e. on the Options tab, we are not capable of selecting [p.date] as the trigger as this is the one we intend to update.
The magic applied now lies in using some kind of circular reference. To circumvent this challenge we need the two extensions and the two parameters.
For our second extension, set it up as for the first one, but swap the parameters. So on “Configure” tab, select p.interim and on Options tab select p.date on the “update list when parameter changes”.
With this, the extension 2 will update [p.interim} which is triggered by the users selection of the date on [p.date].
Now, the extension triggered change to p.interim will trigger the first extension which was set to update p.date the moment p.interim is changed. And since p.interim is changed due to the user selecting a date as a trigger, our circle is complete and all parameters update.
The next screen will clarify this once again.
All that is left to do is to hide the extensions in any way suitable. Just remember that any changes to parameter or the relevant sheet name will trigger a needed reconfiguartion of your extensions.
And with that, you are done. That’s it for today.
I hope you found that useful.
As always appreciate your feedback.
Until next time.
Steffen

Leave a comment